How to Use Shadowsocks WebSocket on Android
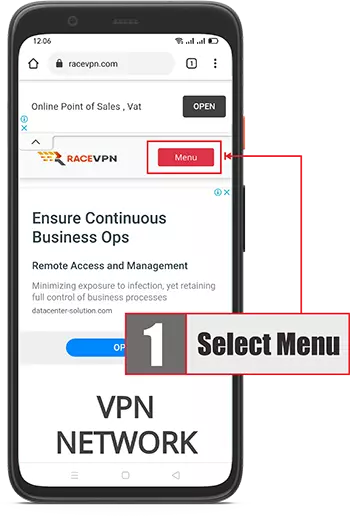
Learn how to use a RaceVPN Shadowsocks WebSocket account on Android with a step-by-step setup guide, screenshots, troubleshooting, and FAQ.
About Shadowsocks WebSocket
Shadowsocks WebSocket combines Shadowsocks-style proxy access with WebSocket transport. It is useful when the server provides a WebSocket-based Shadowsocks configuration.
Protocol note: Compared with normal Shadowsocks TCP, Shadowsocks WebSocket uses WebSocket transport and must be imported into a client that supports that format.
What You Need
Step-by-Step Setup
Step 1: Install and Open the Client
Install a compatible Android client that supports Shadowsocks WebSocket configuration links. Open the app and allow VPN permission when requested.

Step 2: Create a RaceVPN Account
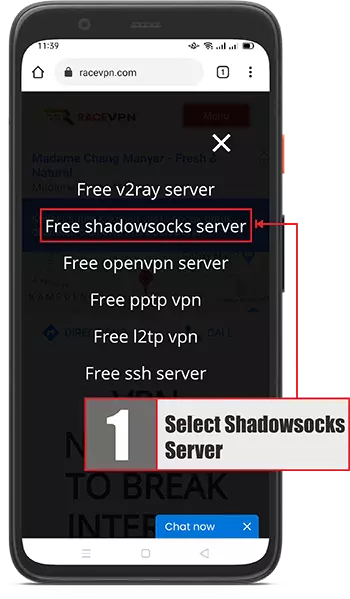
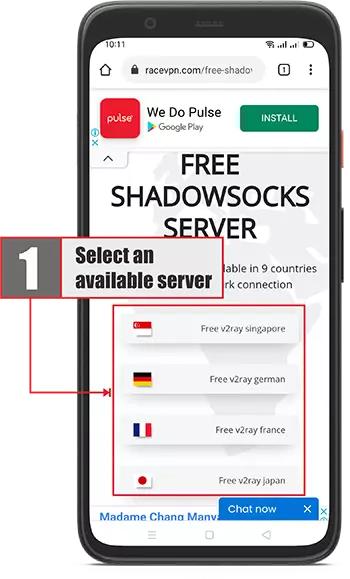
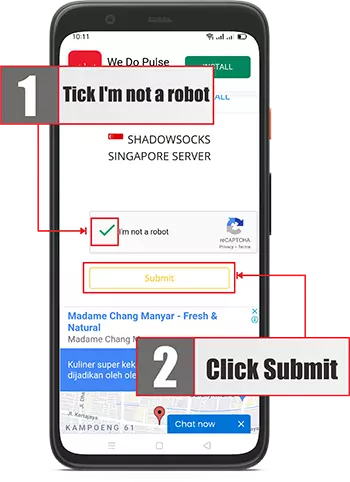
Open the RaceVPN Shadowsocks WebSocket server page, choose an available country server, and create a free account.
Step 3: Add a New Profile
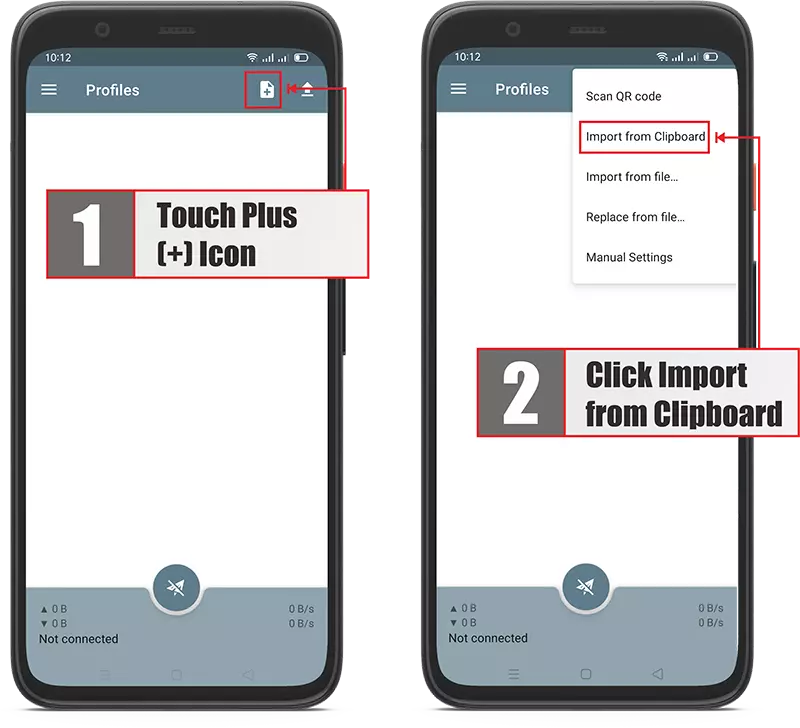
Tap the add button, usually shown as a plus icon, then choose scan QR code, import from clipboard, import URL, or add manually.
Step 4: Import URL or Scan QR Code
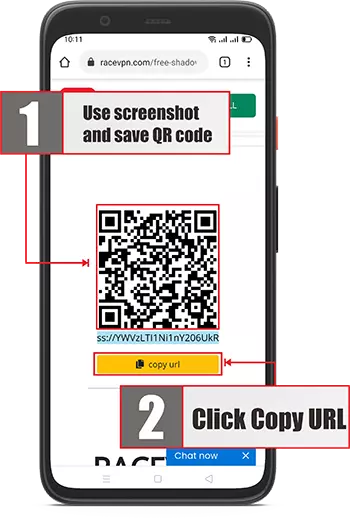
Import the RaceVPN Shadowsocks WebSocket URL or scan the QR code shown on the account result page.
Step 5: Check the Imported Profile
After importing, check that the server profile appears in the app and the country or profile name is visible.
Step 6: Connect to the Server
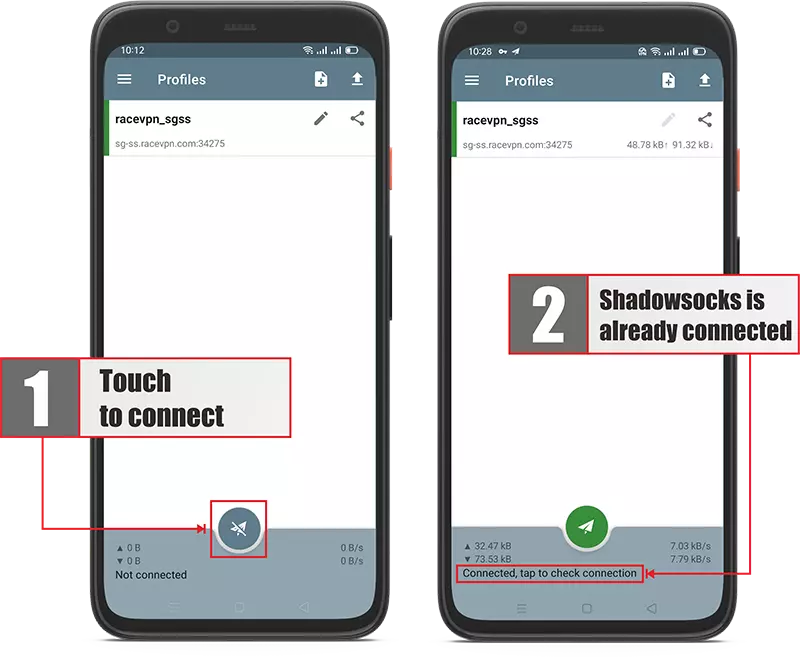
Select the imported RaceVPN Shadowsocks WebSocket profile and tap the connect button.
Step 7: Test the Connection
Open a browser or app and confirm that the connection works normally.
Troubleshooting
Create a Free Shadowsocks WebSocket Account
Need a fresh Shadowsocks WebSocket configuration? Visit the RaceVPN server page and create a free account from an available country server.
View Free Shadowsocks WebSocket ServersFrequently Asked Questions
Common questions about using Shadowsocks WebSocket on Android.
Can I use the same Shadowsocks WebSocket account on many devices?
It is better to use one account for one device only, especially when the server applies connection limits.
Why does my Shadowsocks WebSocket account stop working after a few days?
RaceVPN free accounts have an expiration period. Create a new account when the previous one has expired.
What should I check if Shadowsocks WebSocket does not connect?
Check the account expiry, server status, imported URL, client support, and whether system proxy or tunnel mode is enabled.